
Power Ranger Cookie Cutter
Power Ranger Cookie Cutter
I'm always attempting various projects, so why not share what I learn along the way? I do a lot, so I'll be doing a lot. Today, let's talk about what I learned while trying to print a cookie cutter.

Cookies and Power Rangers
Hasbro has recently announced filming for the 30th anniversary season of Power Rangers will begin this fall. Filming for Power Rangers: Cosmic Fury will take place in New Zealand. Thirty years of keeping the power grind intact and Earth safe. Nothing could convince younger me that the rangers weren't the greatest heroes of all time. My father held the widely popular but clearly misguided opinion that no one stood a chance against "Stone Cold" Steve Austin or The Rock. But in Angel Grove and Blue Bay Harbor, we weren't smelling what The Rock was cooking. Nor was Stone Cold the bottom line! Over the last 12 years, I haven't watched the rangers defend Earth, but distance makes the heart grow fonder. So, when my sister sent me an Instagram video of someone 3D printing a cookie cutter, I had to try it out with none other than a Power Ranger theme.
Goals
Design a mini Red Ranger
Create a 3D model of the cutter
Effectively print the cutter
Bonus: Bake a good cookie
Tools
Figma
AutoDesk Fusion 360
Creality Ender 3 Pro
Cura Slicer
First attempt
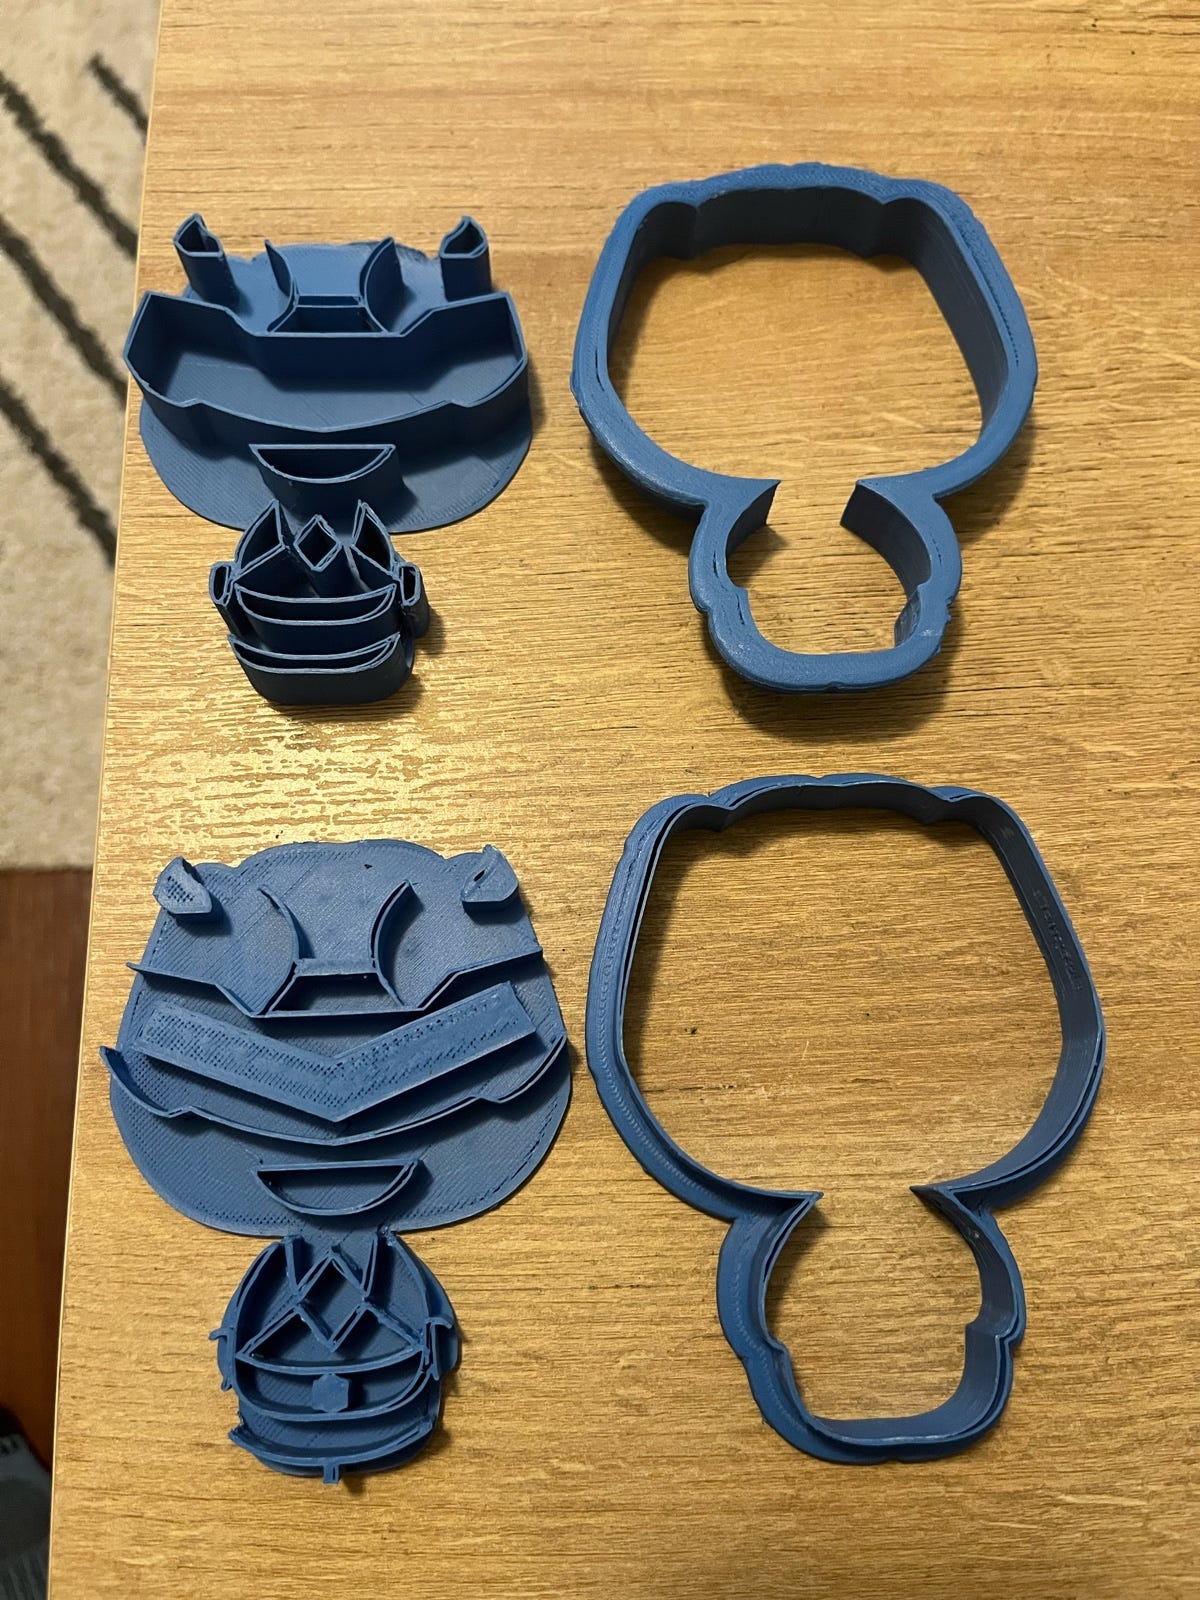
Taking inspiration from the Funko mini Power Rangers collection, I created a ranger design. The first sketch was drawn in Figma. And the outline and embosser were printed in two separate parts. After visiting a few Etsy shops that sell 3D cookie cutters, I noticed they all had the same layout. One cutter for the general outline of the cookie and an additional cutter scaled slightly smaller for the details. I experimented with different layouts; considered putting the embosser on the back of the cookie cutter. Ultimately, I settled on the standard layout due to its cleanliness and ease of use.

What I Learned
I have gaps near the cutter's blades; adjustments to the slicer settings could help solve this problem.
Tight fit for the embosser since it's the exact length and width of the cutter. This raises baking concerns. Will the details be too close to the edge? Consider adding details before cutting the outline.
The design has room for a belt buckle and eye details near the helmet.
Section for ears and forehead details can be filled in.

Talk to me
How'd I do? Tell me what you think of the prints.
Oh yeah, the cookies! A few cookies broke during the baking process. I have to attempt; the baking process was a bit hectic. I loved to cook and cook all the time but baking these cookies, I felt like an amateur. It felt like the last time I was in the kitchen, Emeril was yelling BAM on my TV. If you know any baking tips that could help me out, help me out. Each one, teach one!
All in all, this was a lot of fun, and if you look quickly, there's a Ranger underneath all of the sugar.

